
Gravel Calculator
Welcome to our Gravel Calculator – the simple tool that makes figuring out how much gravel you need for any project quick and stress-free. Whether you’re working on a new driveway, designing a garden path, building a landscaping area, or setting up a solid construction base, this free calculator takes away all the guesswork.
All you have to do is enter the area dimensions and desired depth, and our gravel estimation system will instantly show you the volume of gravel you need. You’ll get results in cubic yards or meters, along with the weight in tons or kilograms. Want to plan ahead for expenses? Just add your price per unit and you’ll see an estimated cost in seconds.
Our gravel quantity calculator is designed to save you time, money, and hassle. It also works as a gravel weight calculator, a gravel cost calculator, and even a gravel requirement estimator—so you don’t have to juggle different tools. No more worrying about ordering too much or too little; our gravel coverage and gravel depth calculation features ensure you get it right the first time.
From gravel for construction projects to gravel for landscaping, this gravel project planning helper makes ordering easier and smarter. Whether you call it a gravel volume calculator, a gravel load calculator, or a gravel tonnage calculator, it’s all built into one easy-to-use platform.
With this material calculator, you’ll have peace of mind knowing your gravel is measured, calculated, and ready for your project—every single time.
Gravel Calculator
Calculation Results
Volume:
Weight:
Gravel is one of the most versatile aggregate materials you can use for your home or landscaping projects. Whether you’re planning a new gravel driveway, a charming pea gravel walkway, or simply need gravel for drainage, choosing the right type and amount is key.
From fine pea gravel that’s smooth underfoot to sturdy crushed stone that provides strong support, gravel comes in many shapes and sizes. But no matter which kind you pick, the tricky part is always figuring out how much gravel you actually need.
That’s where our gravel calculator comes in handy. Instead of guessing, you can easily figure out the exact cubic yards of gravel or tons of gravel required for your project. This saves you money by avoiding oversupply and prevents frustrating delays caused by running short.
Want to know how deep your gravel should be? Or how much area a load will cover? Our guide also includes tips on gravel depth, gravel coverage, and installation best practices. With the right planning, you’ll not only save on gravel cost but also get a long-lasting, professional-looking finish.
So whether you’re tackling a small garden path or a large landscaping project, you’ll have everything you need to get started with confidence.
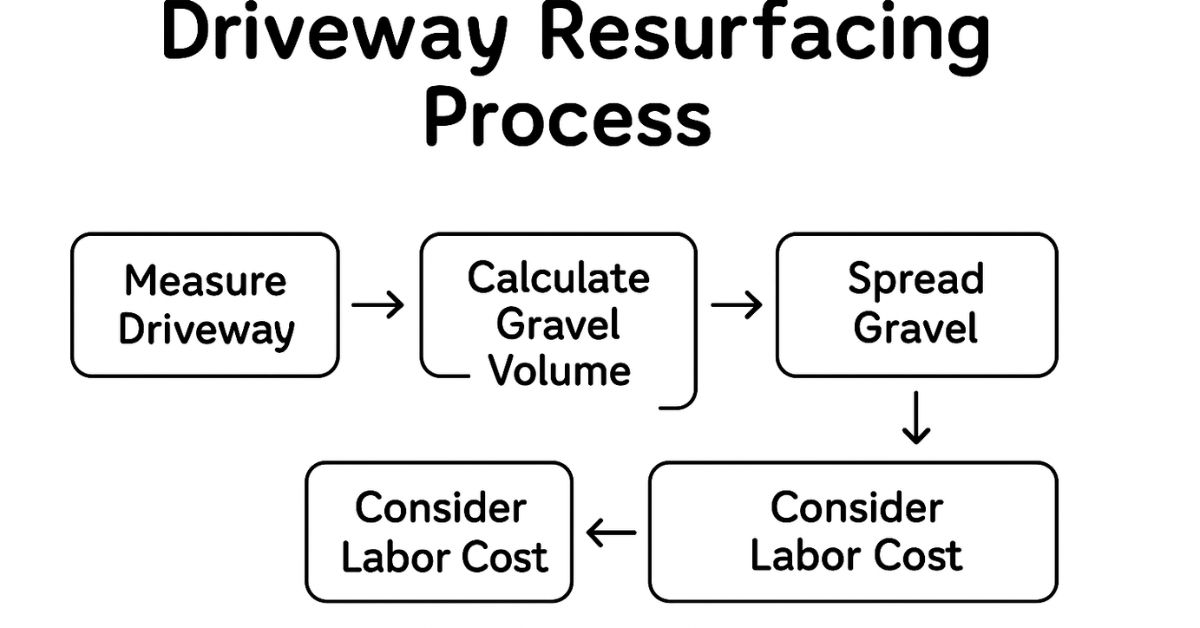
How to Use the Gravel Calculator
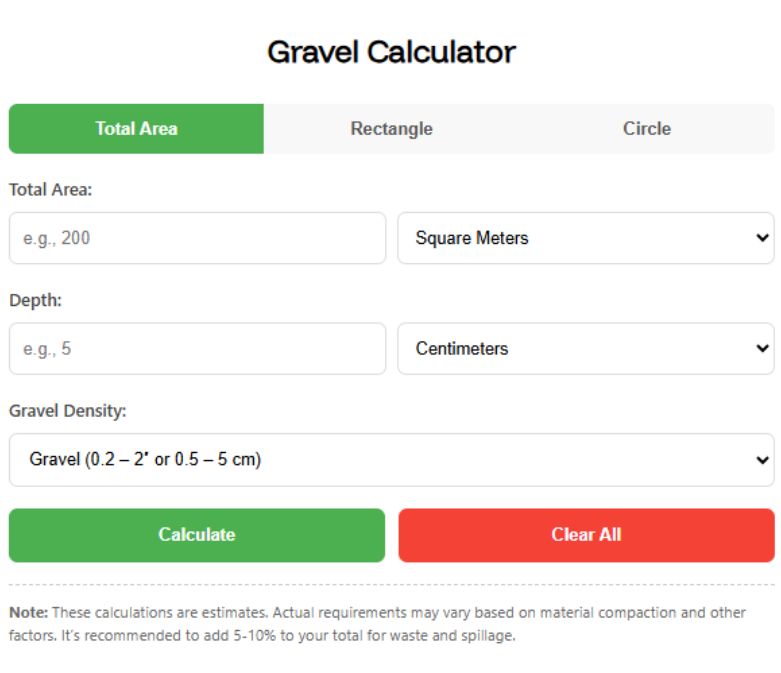
Using our gravel calculator is simple and user-friendly. Just follow these steps:
Measure Your Project Area:
Before you start calculating how much gravel you’ll need, the first step is to measure the project area. Getting the right area size will help you figure out the exact amount of gravel required for proper coverage—so you don’t buy too much or too little.
For irregular shapes: The easiest way is to break them down into smaller, simple shapes (like rectangles, circles, or triangles). Measure each one, calculate their individual areas, and then add them together for the total.
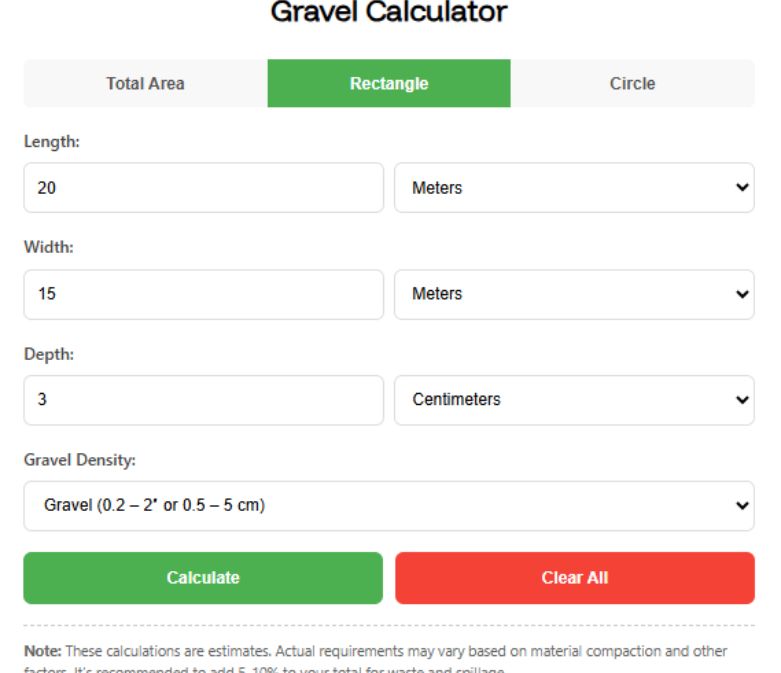
For rectangular or square spaces: Grab a tape measure and note down the length and width. Multiply them together to get the total area.
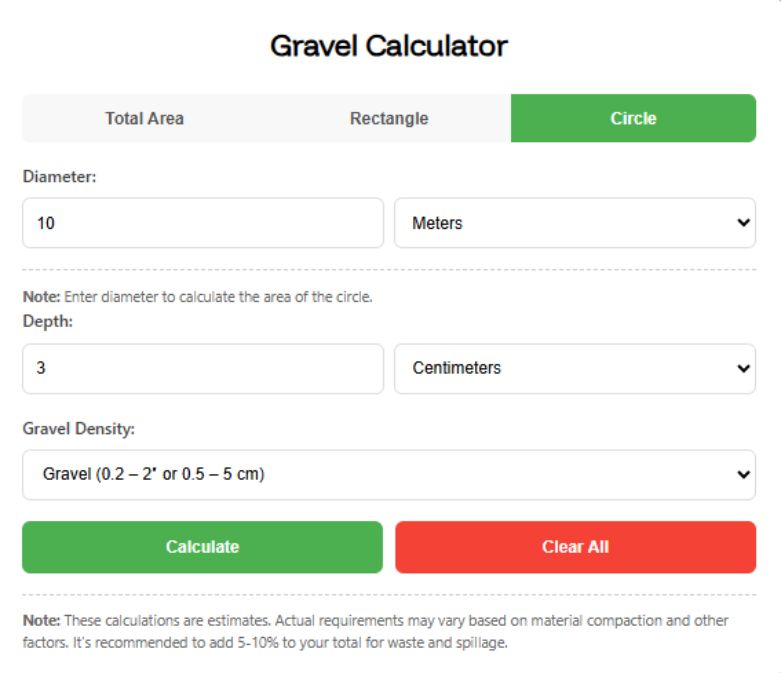
For circular spaces: Measure the diameter (the widest distance across the circle). This will help you calculate the circle’s area easily.
For triangular spaces: Measure the base and height. Then use the simple formula (½ × base × height) to find the area.
Enter Your Area Dimensions:
To start using the area calculator, simply select the shape of your space. Common options include Rectangle, Circle, or Triangle—but you can also choose “Custom Area” if that fits better.
Next, type in your measurements. For example:
With a triangle, you’ll need the base and height.
If it’s a rectangle, enter the length and width.
For a circle, type in the diameter or radius.
Enter Gravel Depth:
The first step is to decide how thick you want your gravel layer to be. This is also called the gravel depth or gravel thickness. For most projects, a common baseline is 2 to 4 inches, which works well for driveways, pathways, or garden beds.
Of course, the right gravel depth can change depending on what you’re building. For example, a light garden path might need less, while a strong driveway could need a thicker gravel base for proper support.
When entering your gravel measurement, choose the unit that makes sense for you—inches, centimeters, feet, or meters.
👉 Example:
The same depth would be about 7.5 cm if you’re entering it in centimeters.
If you want a 3-inch gravel layer, type in 3 when using inches.
Choose Material or Density
When using the gravel calculator, the first step is to pick the material you’re working with. Different materials—like gravel, sand, or a gravel-and-sand mix—have different densities. The calculator usually lists common options such as:
- Standard Gravel
- Gravel + Sand Mix
- Dry Sand
- Wet Sand
Each option comes with a default density value, which is the weight of the material per unit volume. This makes it easier to get an accurate estimate without needing to look up numbers yourself.
If you know the exact density of your aggregate, or if you’re using a unique material, you can simply enter a custom density value. The calculator accepts both pounds per cubic foot (lb/ft³) and kilograms per cubic meter (kg/m³).
👉 For reference, the average gravel density is about 105 lb/ft³ (1680 kg/m³). If you don’t change the settings, this default value is used automatically.
Optional: Enter Gravel Price for Cost Estimate
If you’d like to figure out how much the gravel project might cost, you can also enter the price of gravel in the calculator. This step is completely optional.
Most suppliers list the gravel price per ton, per cubic yard, or sometimes per cubic meter. Just choose the right pricing unit from the dropdown menu and type in the cost.
👉 Example: If your supplier charges $50 per ton of gravel, simply select per ton and enter 50 in the price field.
Once you add this information, the gravel cost calculator will automatically estimate the total cost of the gravel needed for your project.
If you don’t know the price yet or only want to calculate the amount of gravel, you can skip this field. The tool will still give you the gravel quantity, volume, and coverage area without showing the price.
Gravel volume is usually shown in cubic yards, cubic feet, or cubic meters, depending on the settings you choose. This simply tells you the amount of space the gravel will occupy once it’s spread out. Knowing the right volume helps you avoid running short—or buying way too much.
Next is the gravel weight. This can be displayed in US short tons, metric tonnes, pounds, or kilograms. Why does this matter? Because the gravel load can get really heavy. It’s important if you’re planning a truck delivery, or even if you’re picking it up yourself, so you know whether your vehicle can handle the weight.
In short, the gravel calculation gives you both the space it will cover and the weight of the load, making it easier to plan your project without any surprises.
Understanding Gravel Calculation (Formula, Units, and Easy Examples)
When you use a gravel calculator, it’s nice to understand how the numbers actually work. The math behind it is simple, and knowing the basics can help you double-check your gravel estimate before starting a project.
Step 1: Area Calculation
The first step is to figure out the area that needs gravel coverage. The formula depends on the shape of your project:
- Rectangle or Square:
Area = length × width - Circle:
Area = π × (radius)²
(Remember, the radius is half of the diameter.) - Triangle:
Area = 0.5 × base × height - Irregular Shapes:
Break them into smaller shapes (rectangles, circles, or triangles), calculate each, and then add them up for the total area.
👉 If you already know the total square footage or square meters, you can simply use that number instead.
Step 2: Volume Calculation
Once you have the area, the next step is to add gravel depth.
Formula:
Volume = Area × Depth
For example:
- Area = 100 square feet
- Depth = 3 inches (which is 0.25 feet)
- Volume = 100 × 0.25 = 25 cubic feet
This means you’ll need 25 cubic feet of gravel.
Step 3: Converting Units
Gravel is usually sold by the cubic yard, not cubic feet. Since 1 cubic yard = 27 cubic feet, you can convert:
25 ÷ 27 = about 0.93 cubic yards
So, for this project, you’d order roughly 1 cubic yard of gravel.
Why This Matters
Understanding the gravel formula helps you plan better, avoid under-ordering, and save money. The gravel calculator does all the unit conversions for you, but knowing the process makes it easier to:
- Estimate your gravel project needs
- Adjust for different gravel depths
- Compare cubic feet vs. cubic yards
- Avoid running short of material

Weight Calculation gravel
Weight Calculation
After figuring out the volume of gravel you need, the calculator multiplies it by the gravel density to estimate the total weight.
By default, most gravel calculators use a density of 1680 kg/m³ (which equals about 1.68 metric tons per cubic meter or 105 lbs per cubic foot). This gives you a pretty accurate starting point.
👉 For example:
- 1 cubic yard of gravel (about 0.76 m³) usually weighs between 1.3 and 1.5 short tons, depending on the type of material.
But here’s the important part—not all materials weigh the same.
- Wet sand is much heavier than dry gravel.
- Crushed stone, pea gravel, and mixed aggregates also have slightly different weights.
That’s why the gravel weight calculator lets you pick the material type from a list or even enter your own custom density. This makes the estimate more accurate for your specific project.
Finally, the results are shown in clear output units—whether you prefer pounds (lbs), kilograms (kg), or tons—so there’s no confusion when you’re ordering or transporting gravel.
Cost Calculation
Enter the unit price of your material (per ton or per cubic yard), and the calculator will automatically multiply it by the total volume you need. This gives you a quick estimate of the overall cost.
For example, if you need 1.25 tons of gravel and the price is $40 per ton, the estimated cost would be $50. Keep in mind, this number doesn’t include extra charges like delivery fees, hauling costs, or labor expenses.
Since prices can vary depending on your location, supplier, and type of material (gravel, sand, crushed stone, etc.), it’s always a good idea to double-check with your local provider before making a purchase.

Cost Calculation gravel

It’s always a smart idea to order a little more gravel than the exact amount your gravel calculator suggests. Why? Because no project site is perfectly even, and gravel depth can vary once the stones settle or get compacted. If you only order the precise gravel volume that’s calculated, you might find yourself short when covering those uneven spots.
To avoid this, most experts recommend adding about 5–10% extra gravel to your total gravel estimate. For smaller projects, going with +10% is safer, while larger areas might only need about +5%. This little “safety margin” ensures you won’t end up with bare patches or need to place a second order later.
Think of it this way: it’s far better to have a little leftover gravel for future touch-ups than to come up half a ton short when finishing your driveway or garden path.
So, while our gravel calculator gives you the most accurate number possible for your project’s gravel coverage, remember to round up just a bit when ordering. That way, you’ll have peace of mind knowing you’ve got enough material for a smooth, even finish.
Now that we’ve covered why ordering a bit extra matters, let’s move on to some practical details—like deciding how deep your gravel layer should be and how much area a certain load of gravel will actually cover.
How deep should your gravel layer be?
The right depth of gravel really depends on where you’re using it and the size of the stones. Too shallow, and you’ll see bare patches. Too deep, and you might waste money on extra gravel you don’t need. Let’s break it down.
For Garden Paths and Walkways
If you’re laying a garden path, walkway, or decorative landscaping gravel, smaller stones work best. Think pea gravel (about ¼ to ⅜ inch). A 2-inch (5 cm) layer is usually plenty.
Want a little more coverage? You can go up to 3 inches, especially if you’re using slightly larger stones, like ½-inch gravel. This gives a cleaner look and better footing for walking.
For Driveways and Vehicle Areas
Driveways need a sturdier setup because of the extra weight and movement. A gravel driveway depth of around 4 inches (10 cm) is a good starting point if you’re using ¾-inch crushed stone (20 mm gravel).
For heavier traffic or large vehicles, you might want to go even deeper—4 to 6 inches. This ensures the gravel doesn’t shift or sink too quickly.
The Base Layer Trick
A common method for driveways is to build in layers:
- Start with 2–3 inches of coarse base gravel (like crushed stone).
- Then add 2–3 inches of finer gravel on top.
That gives you a total gravel depth of about 4–6 inches, creating a strong foundation with a smooth finish.
How much area does a certain amount of gravel cover?
When you’re planning a gravel project—like a driveway, pathway, or garden bed—the first question that usually comes up is: “How much gravel do I actually need?” The answer depends on two main factors: gravel depth and whether you’re measuring by the cubic yard of gravel or by the ton of gravel.
A cubic yard of gravel (which equals 27 cubic feet) will cover about 100 square feet at 3 inches deep. If you spread it thinner, say at 2 inches deep, one yard could stretch to cover around 150 square feet. On the flip side, if you want a thicker layer, about 4 inches deep, you’ll only get coverage of around 75 square feet.
Here’s the math behind it:
- 27 cubic feet spread across 100 sq. ft = 0.27 feet (about 3.3 inches thick).
- Spread across 150 sq. ft = 0.18 feet (about 2.1 inches thick).
So, the thinner you spread it, the more area it covers—but the less solid the base will be.
Now, if you’re buying by weight instead of volume:
- One ton of gravel (about 2,000 pounds) typically covers 80–100 sq. ft at 2 inches deep.
- At 3 inches deep, that same ton covers closer to 80 sq. ft.
- Go deeper, around 6 inches, and coverage drops to only about 40–50 sq. ft.
Of course, these numbers are based on average gravel density. If you’re using something lighter, like pea gravel, or heavier, like crushed stone, the coverage will change. Even moisture can affect it—wet gravel weighs more than dry gravel.
That’s why many homeowners use a gravel coverage calculator before buying. It saves money, helps estimate gravel cost per yard, and prevents those frustrating mid-project trips back to the supply yard.
In short:
- 1 cubic yard of gravel = ~100 sq. ft at 3 inches deep
- 1 ton of gravel = ~80–100 sq. ft at 2 inches deep
Always plan your gravel depth based on the project. A thin 2-inch layer is fine for decorative paths, while driveways or heavy-use areas usually need at least 4–6 inches for a solid, long-lasting base.
Types of Gravel and Material Considerations
When people say “gravel,” they might be talking about different materials. Gravel isn’t just one thing—it can mean natural river rock, crushed stone, or other types of construction aggregate. Each type has its own look, weight, and purpose.
The type of gravel you choose can change how much you’ll need (because of differences in density) and how well it works for your project. For example, some gravels are perfect for landscaping because they look smooth and decorative, while others are stronger and better for driveways, pathways, or drainage systems.
Here are some common options and what to keep in mind:
- Crushed Stone – Made by mechanically breaking down larger rocks. It’s sharp, heavy, and works well for driveway gravel or a strong base under concrete.
- River Rock / Pea Gravel – Rounded and smooth because it comes from natural rivers. It’s lighter, decorative, and great for gardens, patios, and landscaping projects.
- Mixed Aggregates – A blend of sand, gravel, and stone that’s often used in construction because it packs down well and provides stability.
So, before you start your project, think about the type of gravel you actually need. Choosing the right one not only makes your space look good but also ensures it lasts longer and performs better.
Pea Gravel
Pea gravel is made up of tiny, rounded stones, usually about 3/8 inch (10 mm) in size, which is about the same as a green pea—hence the name. These little pebbles have a smooth texture and often come in natural, earthy shades like tan, brown, gray, and white. Because of their look and feel, pea gravel is one of the most popular choices for decorative landscaping projects.
Where Can You Use Pea Gravel?
One of the best things about pea gravel is its versatility. It works beautifully in:
- Pathways and walkways – soft underfoot and easy to walk on.
- Playgrounds – gentle enough for kids to play safely.
- Garden beds – acts as a mulch alternative while keeping weeds down.
- Patio areas – gives outdoor spaces a clean, natural look.
It’s also sometimes used in driveways, though you’ll notice it shifts under the weight of cars. If you do use it for a driveway, expect to see tire ruts or footprints over time. A quick rake usually smooths it back out.
Things to Keep in Mind
Since pea gravel is lightweight and moves around easily, you’ll often need edging (like bricks, metal, or plastic borders) to keep it from spreading outside the area you want it. Its small size means it can pack densely, but it still shifts more than crushed stone.
Pea Gravel Density
When it comes to volume, pea gravel is fairly standard, with a density of about 1.4–1.5 tons per cubic yard. That’s helpful to know when you’re ordering for a project. To make things easier, our Pea Gravel Calculator is designed specifically for projects using this material, so you get precise measurements and no wasted loads.
Crushed Stone (Angular Gravel)
Crushed gravel is made by breaking down bigger rocks in a quarry into smaller, usable pieces. Unlike smooth river rocks, these pieces have angular edges and a rough surface. Common types include crushed limestone, granite, and basalt, which are widely used in construction.
One big advantage of crushed stone is that the sharp edges help the pieces lock together when compacted. This makes it an excellent choice for driveway bases, road construction, and structural fills, where strength and stability really matter. Once packed down, it creates a firm surface that doesn’t shift or move around like rounded gravel often does.
Another thing to note is that crushed gravel can feel a bit heavier because of its tight compaction and higher density. That’s actually a good thing if you need a solid foundation for heavy-duty projects.
If you select “crushed gravel” in our calculator, it automatically applies the correct density value for accurate results. For even more precise measurements, you can also try our dedicated Crushed Gravel Calculator to plan your project with confidence.
River Rock
River rock, also called creek stones, are smooth, rounded stones shaped naturally by water over time. They’re usually larger than regular gravel—often 1 inch or more in diameter—and come in a variety of earthy colors that instantly add a natural, decorative look to any outdoor space.
Where to Use River Rock
These landscaping stones are mostly decorative but also serve practical purposes. You’ll often see them:
- In garden beds as ground cover
- Along ponds or water features for a natural look
- In drainage ditches or dry creek beds since water can easily flow between the stones
Because of their size and smooth shape, river rocks provide excellent drainage while still looking beautiful.
Coverage and Weight
One important thing to know about river rock coverage per ton is that larger stones don’t spread as evenly as smaller gravel. Since there’s more empty space between each rock, you’ll need more volume to cover the same area compared to compact materials like pea gravel.
They’re not usually measured for solid coverage, but you can still estimate how much you’ll need with a gravel calculator. Just keep in mind that the surface won’t look like a perfectly packed layer—there will be natural gaps.
When it comes to weight, river rock per cubic yard tends to be heavier as the stone size increases. On average, you can expect around 1.4–1.5 tons per cubic yard, but this number can vary depending on the specific type and size of the stone.
Why Choose River Rock?
If you’re looking for decorative rocks for landscaping that are both attractive and functional, river rock is a top choice. It’s long-lasting, low-maintenance, and perfect for creating natural-looking spaces while improving drainage around your yard.
Sand and Gravel Mixes
Sometimes a project calls for more than just plain gravel. For example, builders often use a sand and gravel mix as a strong base layer or when making concrete. This combo works well because sand is fine and fills in the gaps between gravel pieces, which increases the overall density.
When you add sand, especially wet sand, the mix usually weighs a bit more compared to dry gravel alone. That’s why if you choose the “gravel with sand” option in our calculator, it automatically adjusts the density to give you a more accurate result.
If your project only needs sand, don’t worry—we’ve got you covered too. For sand-specific projects, you might want to check out our other guide, How Much Sand Do I Need?, which helps you figure out the exact amount without mixing in gravel.
Limestone vs Granite vs Slate
Common Types of Gravel and Their Uses
Gravel isn’t just one-size-fits-all. It comes in different types, and each has its own look, weight, and best use. Here are a few popular options you’ll often see:
Crushed Limestone
This type of gravel is one of the most common choices for driveways and base layers. It compacts really well, which makes it strong and stable under heavy loads. Since limestone has some natural carbonate, it can also help the gravel bind together, creating a firm surface that doesn’t shift around as much.
Decomposed Granite
If you’ve ever walked on a reddish-brown garden path, chances are it was made from decomposed granite. This gravel is finer than regular stone and packs almost like sand, giving it a firm but natural feel underfoot. It’s a favorite for pathways, patios, and even in landscaping where you want a rustic look.
Slate Chippings
Unlike rounded gravel, slate chippings are flat, thin shards that give a decorative touch to gardens. They’re very popular in the UK because of their variety of colors and stylish appearance. Beyond looks, slate can also help with weed control when spread as a mulch around plants.
Why Density Matters in Gravel Calculations
Even though these materials look and feel different, when it comes to calculating volume, the process is basically the same. The main thing that changes is the density of the aggregate—in other words, how much it weighs per cubic yard or per cubic meter. For example, crushed limestone will weigh differently than slate chippings or decomposed granite.
If you’re using a specialized material, always check the supplier’s weight guide. Most suppliers can tell you the cubic yard weight of their gravel, which helps you figure out exactly how much you need for your project—whether it’s a driveway, garden path, or decorative landscaping.
When you’re planning a gravel project, it’s important to think about both looks (aesthetics) and practical use (functionality). Gravel isn’t a one-size-fits-all material—you often need to work in layers of gravel with different sizes to get the best results.
Take a driveway as an example. For a strong foundation, you’d usually start with a layer of 2-inch crushed stone or larger driveway gravel. This gives your project a solid, supportive base that can handle weight without shifting around.
On top of that, you might add a finer layer, like ½-inch or ¾-inch gravel, to create a smoother surface that’s easier to walk and drive on. This mix of coarse gravel underneath and smaller gravel on top makes the driveway both sturdy and attractive.
If you’re not sure how much gravel you’ll need for each layer, a gravel calculator comes in handy. Just calculate each layer separately—remembering the correct gravel depth for every section—and you’ll get a much more accurate estimate.
When picking gravel for your outdoor space, it really comes down to how you plan to use it.
Rounded gravel such as pea gravel or river stones has a smooth, polished look that makes it great for landscaping gravel in gardens, pathways, or seating areas. It’s much more comfortable to walk on barefoot, and it adds a decorative touch to your yard. The downside? Since the stones are rounded, they don’t lock together very well and can shift or spread out under pressure.
On the other hand, angular gravel like crushed rock is sharper and more jagged. This shape helps the stones stay in place, giving you more strength, durability, and stability. That’s why driveway gravel or areas that see heavy foot traffic often use crushed stone—it won’t move around as easily as pea gravel.
The best choice depends on your project. If you want comfort and style, go for pea gravel in a garden or patio. If you need stability and long-lasting support, choose crushed rock for driveways, parking areas, or foundations.
Gravel isn’t just about size and shape—it also comes in a variety of colors like brown, gray, white, red, and even black. The color itself won’t change your gravel calculation, but it definitely changes how your project will look and feel.
When choosing gravel for landscaping or pathways, think about whether you want the stone to blend in with the surroundings or stand out as a contrast. For example, neutral tones like gray or brown can give a natural, seamless look, while bold shades like red or black gravel create eye-catching accents in your outdoor design.
One important thing to keep in mind is heat absorption. Dark-colored gravel tends to soak up heat from the sun, which can make it hot to walk on barefoot—something you’ll notice quickly if you’re using gravel for patios or garden paths. Lighter gravel colors, like white or light gray, reflect sunlight and stay much cooler, making them more comfortable in areas where people or pets will be walking.
In short, the color of your decorative gravel plays a big role in the overall mood of your project. It’s not just about function—it’s about style, comfort, and how the space feels when you use it.
No matter which type of material you’re working with, our calculator makes quantity estimation quick and simple.
If you’re not sure which tool fits your project best, don’t worry—we’ve got you covered with a variety of options. For example, if you’re working with pea gravel or crushed stone, you’ll find our Stone Calculator and Rock Calculator especially handy. These tools are designed for different aggregate materials but follow the same easy principles.
The only difference? Each calculator may already include typical density values or pre-set scenarios, making your project estimation even smoother. That way, whether you’re filling a driveway, garden path, or landscaping feature, you’ll always have the right numbers at your fingertips.
Tips for a Successful Gravel Project
Figuring out how much gravel you need is step one. Step two? Actually putting it to good use. Once you’ve done the math with a gravel calculator—taking into account your coverage area, depth, and even the gravel density—it’s time to roll up your sleeves and get practical.
Here are some expert tips to help your project run smoothly:
Match gravel type to project
Pea gravel looks great in gardens and play areas, while angular crushed stone is perfect for driveways because it locks together better under pressure.
Always order a little extra
Gravel tends to settle and shift over time. Having an extra 5–10% ensures you won’t run short while covering your driveway base, garden path, or landscaping project.
Think about drainage
A proper gravel layer helps water flow instead of pooling. For driveways or patios, aim for a compacted base of crushed stone beneath your top layer of decorative gravel.
Use the right depth
Too thin, and the ground shows through. Too thick, and it feels unstable. As a general rule, 2–3 inches works for paths, while 4–6 inches is better for driveways.
Compact as you go
Don’t just dump gravel and leave it. Spread it evenly, rake it into place, and use a tamper or roller to compact each layer. This gives you a solid, long-lasting surface.
Order a Little Extra
When you’re calculating how much gravel you’ll need, it’s smart to order 5–10% more gravel than your estimate. This extra bit covers common issues like compaction, spillage during delivery, or if your project area ends up being a little bigger than you planned.
Running short can be a headache—getting a second delivery of gravel usually costs much more than just ordering a little extra upfront.
👉 For small projects (like garden paths or filling planters), it’s even better to have 15–20% extra gravel on hand. With smaller quantities, small errors in measuring can feel like a big problem. The good news is, spare gravel never really goes to waste—you can use it later for things like filling potholes, improving drainage, or topping up worn areas.
Preparing the Base
Before you pour out your gravel, the groundwork matters a lot. If you’re laying driveway gravel or making a gravel path, don’t just throw it straight on top of grass or soil.
- First, strip away the grass or topsoil to expose a solid base.
- For heavy-use areas like gravel driveways, lay down a layer of crushed stone or a gravel sub-base. This gives strength and stability.
- Adding a geotextile landscape fabric under the gravel is also a smart move. It stops the gravel from mixing with the soil, keeps the surface stable, and cuts down on weeds pushing through.
A well-prepared gravel base means your surface will last longer, drain better, and look neat with less maintenance.
Layering and Compacting Gravel
If you want a surface that holds up over time—like a driveway—you’ll need to spread gravel in layers and compact each layer.
- Start with about 2 inches of gravel, spread it evenly, and then compact gravel with a tamper or roller.
- Add the next 2 inches, compact again, and repeat until you reach your desired depth.
This step makes the gravel settle tightly, reducing shifting and loose spots. Many driveway gravel installations use a 3-step system:
- Sub-base with coarse stone
- Middle layer with medium gravel
- Top layer with fine gravel
For something lighter, like a garden path or a landscape feature, you can get away with just one layer. Still, it’s worth raking and lightly compacting the gravel so you don’t end up with uneven patches.
Consider Edging
Gravel has a habit of moving around over time, especially if it isn’t kept in check. That’s where gravel edging comes in handy. By adding borders—like stone, metal, plastic strips, or even wooden beams—you can keep your gravel path or gravel driveway neat and tidy.
Not only does edging give your gravel landscaping a sharp, finished look, but it also helps with gravel containment. It keeps the stones from spilling into your lawn, garden beds, or onto the street. Think of it as a simple way to save yourself from constantly sweeping stray gravel back into place.
Whether you’re working on a backyard walkway, a garden border, or a full gravel driveway, installing edging is one of the easiest tricks to make your outdoor space look polished and low-maintenance.
Maintenance
Taking care of a gravel area is pretty easy, and a little effort goes a long way. Every now and then, give the surface a quick rake to even things out and move gravel back into low spots. This helps keep everything level and neat.
Over time, you may want to add a fresh top-up layer of gravel—usually every couple of years—to keep the surface looking clean and full.
Weeds can sometimes sneak through, so it’s best to pull them out early or use a weed suppressant to keep them under control.
If you’re maintaining a gravel driveway, you might notice wheel ruts forming from regular use. No worries—just rake or move gravel from the edges back into the center to smooth things out.
With these small upkeep tasks, your gravel path, patio, or driveway will stay attractive and low-maintenance for years.
-
Affordable Guide: How Much Does a Truck Load of Pea Gravel Cost?
How much does a truck load of pea gravel cost? This is a question many homeowners, landscapers, and builders ask when planning a new…
-
How Much Does a Dump Truck Load of Gravel Cost in 2025? (Complete Pricing Guide)
How much does a dump truck load of gravel cost in 2025? If you’re planning a driveway, walkway, parking lot, or landscaping project, this…
-
How Much Sand Do I Need? Accurate Guide for Stress-Free Projects
How much sand do I need is the first question most homeowners, builders, and landscapers ask before starting a project. Getting the calculation right…
-
How Much Does a Yard of Gravel or Sand Weigh? Complete Project Planning Guide
How much does a yard of gravel or sand weigh? This is one of the first questions people ask when starting a landscaping project…
-
How Much Is a Yard of Gravel? Affordable 2025 Pricing, Costs & Expert Guide
A yard of gravel is one of the most budget-friendly and versatile building materials for both home projects and commercial projects. Gravel is widely…
-
What is Gravel? Complete Construction Guide with Types and Uses
What is Gravel? If you’ve ever walked on a gravel driveway, strolled along a garden path filled with pea gravel, or admired a water…
Frequently Asked Question
How much gravel do I need for my driveway?
Before ordering gravel, it’s a good idea to measure your driveway so you don’t buy too little—or way too much. Start by measuring the length and width of the driveway, then decide how deep you want the gravel layer to be. For most driveways, a 4-inch gravel depth is standard.
Let’s look at an example. A driveway that measures 16 feet by 40 feet (that’s 640 square feet) with a depth of 4 inches would need about 7.9 cubic yards of gravel, which comes out to roughly 11 short tons of driveway gravel.
Instead of doing the math by hand, you can use a gravel calculator. Just plug in your driveway’s dimensions, pick the depth, and it will give you the exact amount in cubic yards or tons.
👉 Pro tip: For the best results, start with a layer of coarse crushed stone or base gravel, then add a finer top layer for a smoother finish. Don’t forget to order about 5–10% extra gravel to cover compaction, settling, or uneven ground.
This way, you’ll have the right amount of gravel for solid coverage and a durable driveway.
How much gravel for a garden or landscape project?
When planning your landscaping project, the first step is to measure the area where you want to spread gravel. Once you know the size, decide on the gravel depth—for most decorative gravel, a layer of about 2–3 inches works best.
For example, a 100 sq. ft. garden bed with a 2-inch depth will need around 0.62 cubic yards of gravel, which equals roughly 1 ton.
If your garden or pathway has irregular shapes, don’t worry. Just break the space into smaller, easier-to-measure sections, or make a close estimate.
It’s usually smart to slightly overestimate your gravel coverage. This way, you won’t run short, and any extra gravel can be used in other parts of your yard or landscaping project.
What depth of gravel should I use?
The right gravel depth really depends on what you’re building. Different projects need different gravel thickness to stay strong and last longer.
- Walkways and patios: A layer of about 2 to 3 inches of gravel usually works well. That’s enough to give you a neat, stable surface without wasting material.
- Driveways: Since driveways take more weight, you’ll want around 4 to 6 inches of driveway gravel. Many people lay it in two layers—a coarse gravel base at the bottom for strength, topped with finer gravel for a smoother finish.
- Under concrete or pavers: If you’re using gravel as a base layer, aim for at least 4 inches of compacted gravel. This helps prevent shifting and keeps everything level.
- By gravel size: The thickness also changes with the size of the gravel:
- 10mm gravel → needs about 1.5 to 2 inches
- 20mm gravel → works best at 2 to 3 inches
- 40mm gravel → should be at least 3 inches deep
As a general rule, starting with 2 to 3 inches of gravel is safe, and then you can adjust depending on the project and the material you’re using.
How much area does one ton of gravel cover?
How much area a ton of gravel will cover really depends on how deep you spread it. The depth of gravel plays the biggest role in coverage.
- If you spread gravel about 2 inches deep, one ton will cover around 100 square feet.
- At 3 inches deep, the same ton covers closer to 80 square feet.
- If you only go 1 inch deep, a ton could cover as much as 240 square feet—but 1 inch is usually too thin for driveways, paths, or most landscaping projects.
A simple rule of thumb: 1 ton of gravel covers about 100 square feet at a 2-inch depth. This is the quick estimate many people use when planning projects like a gravel driveway, patio base, or garden path.
If you want more accurate numbers for your project, using a gravel calculator makes it much easier.
How many tons are in a cubic yard of gravel?
On average, a cubic yard of gravel weighs around 1.3 to 1.4 short tons. That’s about 2,600 to 2,800 pounds.
The exact weight can change depending on a few things—mainly the type of gravel and the moisture content. For example, wet gravel is naturally heavier than dry gravel, and finer materials like sand or gravel with sand mixed in can pack tighter, which also changes the weight.
Most gravel calculators and suppliers stick with 1.3 tons per cubic yard as a standard estimate. It’s not exact, but it’s a good starting point when you’re figuring out how much material you’ll need for your project.
If you want a more precise number, you’ll need to consider the gravel density, whether you’re using pea gravel, crushed stone, or gravel with sand, and how deep you plan to spread it.
How much does a cubic yard of gravel weigh?
A cubic yard of gravel usually weighs somewhere between 2,800 and 3,000 pounds. That’s about 1.4 to 1.5 short tons, or if you prefer metric, around 1,270 to 1,360 kilograms.
But here’s the catch: not all gravel weighs the same. The actual gravel weight depends on the gravel density and whether it’s dry or wet. For example, wet gravel is much heavier because the tiny water droplets fill in the spaces between the stones, adding extra weight.
That’s why using a gravel calculator makes life easier. The calculator automatically adjusts based on the type of material you choose—whether it’s standard gravel, gravel mixed with sand, or even wet sand. This way, you’ll get the most accurate estimate of how much your load really weighs, no matter if you’re calculating in pounds, tons, or kilograms.
How much does gravel cost?
Gravel prices can change depending on the type of gravel you choose and where you live. On average, basic crushed stone costs between $10 to $50 per ton, or about $15 to $75 per cubic yard. If you’re looking for something more stylish, like decorative gravel or colored stones, expect to pay closer to $100 or more per ton.
For smaller projects, you might buy bagged gravel from a home improvement store. A typical 50-pound bag costs around $4 to $8. While convenient, bagged gravel is much more expensive per ton compared to buying in bulk.
Don’t forget about delivery fees. Most suppliers charge anywhere from $50 to $100, depending on how far you live and how much gravel you’re ordering. Some companies may also have a minimum order requirement.
If you want a clearer picture of your total cost, try using a gravel calculator. Just enter your area size, depth, and your supplier’s price per unit (per ton or per cubic yard). This gives you a quick estimate of how much material you need and what it will cost. Keep in mind that labor costs for spreading or installation aren’t usually included in the calculator’s estimate.
What is the best gravel for a driveway?
If you want a gravel driveway that’s strong, stable, and doesn’t fall apart after a few months, the secret is using the right gravel layers. A single layer of loose gravel won’t cut it—cars will sink, the surface will shift, and drainage will suffer. Instead, build your driveway in layers for a long-lasting foundation.
Start with a base layer of crusher run or #3 stone. These are larger, angular pieces of crushed stone (about 1–2 inches). They create a firm driveway base that locks tightly together and helps with load-bearing. On top of that, add a layer of #57 crushed stone (roughly ¾ inch). This smaller gravel fits neatly into the gaps of the base layer, giving you a stable driveway surface that still allows water to drain properly.
One thing to avoid? Pea gravel on its own. Since it’s smooth and round, it tends to roll around under car tires, making the surface unstable. If you like the look of pea gravel, you can use it as a thin finishing layer, but never as the main structural material.
For best results, aim for a total gravel depth of 4 to 6 inches, especially if your driveway will handle heavy traffic. This depth gives you enough strength and durability while preventing washouts and ruts.
How much gravel can a dump truck carry?
If you’re planning a gravel delivery, it helps to know how much a truck can actually haul. Large dump trucks usually hold about 10 to 16 cubic yards of gravel, which works out to 15 to 20 tons.
For smaller projects like driveways or landscaping, suppliers often use smaller dump trucks. These typically carry around 5 to 8 cubic yards, or 8 to 12 tons.
👉 Always check with your supplier about the truck size before ordering. Full loads are very heavy and may damage soft ground or pavement if the site isn’t prepared.
Can the Gravel Calculator Be Used for Sand or Other Materials?
Yes! The calculator isn’t just for gravel. It works for all bulk materials such as sand, mulch, topsoil, or crushed stone.
The only thing that changes is the density of the material. For example:
Wet sand is heavier than dry sand.
Soil and mulch are lighter than gravel or crushed rock.
All you need to do is enter the area and depth of your project, then plug in the right material density. The calculator will instantly give you an accurate volume and weight estimate, helping you figure out how many cubic yards or tons you’ll need.
Try It Free Calculator gravel
Just enter the length, width, and depth of your area into the gravel calculator, and it’ll instantly show you how much gravel you need. The tool will calculate the total volume and even estimate the weight, so you know exactly how much to order—no more guesswork or wasted trips.